Textures
Choose a texture
To choose a texture to apply, you have 3 possibilities :

a) click on the square of the EDIT MESH window then choose an image on your PC,
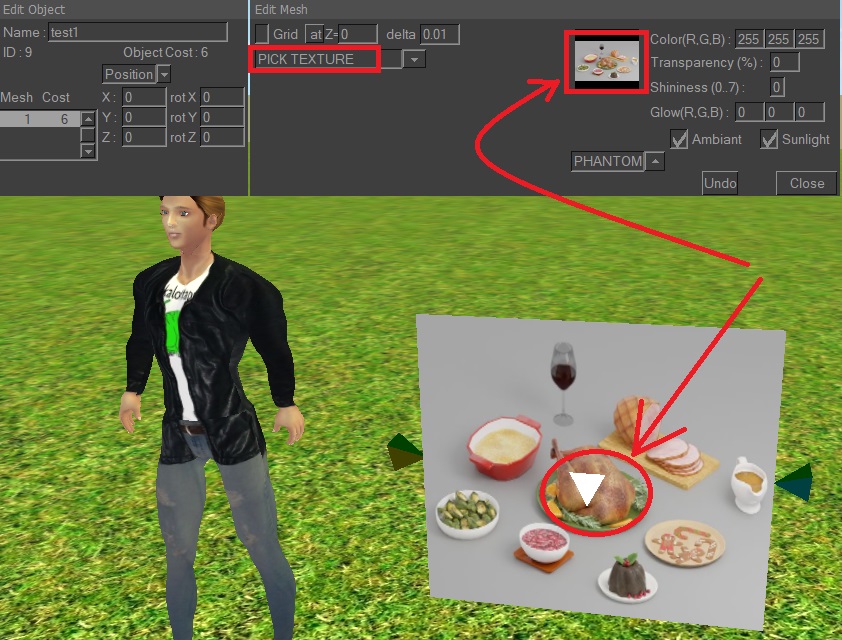
b) or select the mode PICK TEXTURE, then click on a small pyramid :
the texture then appears in the square in the EDIT MESH window,
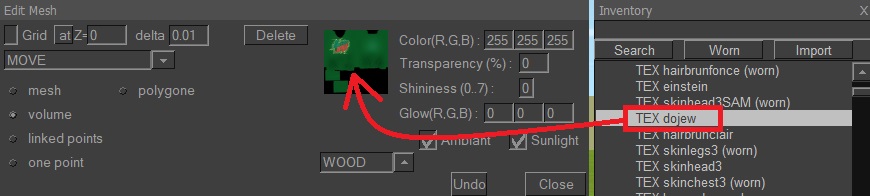
c) or drag a TEX texture from your inventory to the small square in the EDIT MESH window.
Apply a texture
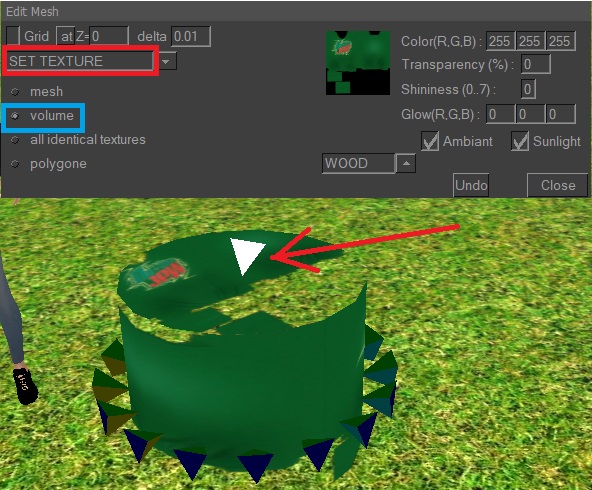
To apply the texture, select the SET TEXTURE mode
and click on a small pyramid to change the texture.
Choose :
- the MESH sub-option to change all the textures of the mesh,
- or the VOLUME sub-option to change all the textures of a volume,
- or the ALL IDENTICAL TEXTURES sub-option to change the clicked texture and all identical ones in the whole mesh,
- or the POLYGON suboption to change only one polygon.
Stretch a texture
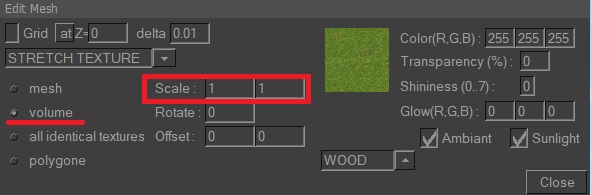
To stretch a texture (so that it repeats itself several times), go to STRETCH_TEXTURE mode,
then click on a pyramid of the volume you want to stretch.
Then choose a stretching scale (e.g. scale 4 to repeat 4 times),
or 0.25 to shrink 4 times, or -1 to reverse the direction of the texture).
The first scale is horizontal stretching, the second is vertical stretching.
Type twice the same values if you want the texture to keep its proportions.
You can enter an angle in Rotate to rotate the texture,
or an offset to move it.
All Texture options
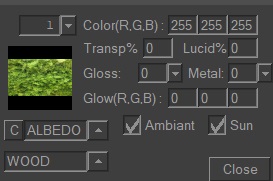
- The "1" above the texture opens a drop-down list displaying all the textures in this mesh.
- COLOR : allows you to specify an sRGB color (from 0 to 999) to be mixed with the ALBEDO texture.
Values above 255 make the texture lighter.
- TRANSPARENCY : indicates whether your texture is transparent (0% = no, 100% = yes).
- TRANSLUCENT : allows you to specify, when your texture is illuminated on one side, whether light also illuminates it on the other side (from 0 to 100%).
Example: tree leaves.
- GLOSS : 0% indicates a rough texture that reflects little light,
99% indicates a smooth texture featuring reflections of the sunlight or lamps.
(GLOSS is the reverse of ROUGHNESS in some PBR tutorials)
- METAL : this option should be set to 100% if your material is metallic: reflections are then not white but the color of the metal,
and the sky causes reflections. Leave 0% for non-metallic materials.
For example, for a car exterior, choose GLOSS 93 and METAL 100.
- GLOW : allows you to specify the RGB color of a false light that illuminates this texture all the time. Example: a neon light.
Note that this is not a real light, as it does not illuminate the surroundings.
- AMBIENT : uncheck if daylight should not illuminate this texture, e.g. in a cellar.
- SUN : uncheck if sunlight should not illuminate this texture, e.g. in a cellar.
- C: deletes the current texture.
- ALBEDO: Selects a special texture (see below).
- WOOD: selects the physical material (see below).
List of special textures
- ALBEDO : this is the classic RGB color texture
- NORMAL : bluish texture to give the material a false relief under the effect of light.
- METALNESS : black/grey/white texture to specify whether part of a mesh is metallic.
White pixels indicate a metallic part, black pixels a non-metallic part.
- ROUGHNESS : black/grey/white texture used to specify whether part of a mesh should reflect light.
White pixels indicate a rough part that reflects little light, black pixels a smooth part that reflects a lot of light.
- OCCLUSION : black/grey/white texture used to specify whether part of a mesh should not be illuminated by ambient daylight.
White pixels indicate a part that should be illuminated by ambient light, black pixels a part that should not be illuminated.
This only has an effect on ambient daylight. It has no effect on sunlight or lamps.
Ambient occlusion textures are used to darken the inside of clothing folds, a hood, or the corners of a room away from the window.
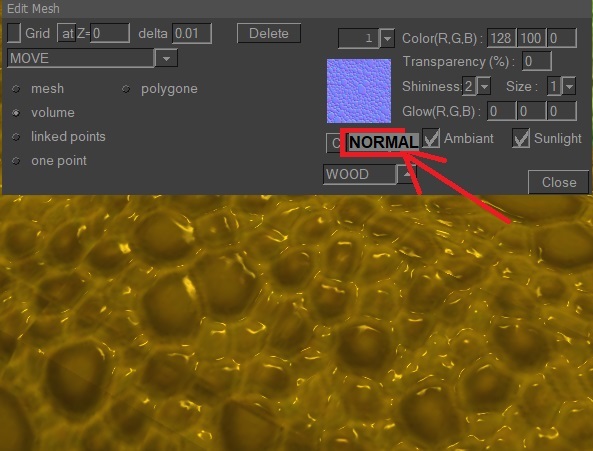
For example, to give relief to your materials, you can add a 2nd special texture called "normal" (there are plenty on the internet, they are all blue textures).
Choose the NORMAL mode and load the 2nd texture. The effect becomes visible especially with a little light and gloss.
The C button erases the texture.
The physical matter of a texture

You can also choose the physical matter of a texture.
Select the mode PICK TEXTURE, then click on a small pyramid :
the texture then appears in the square of the EDIT MESH window.
The matter appears underneath and can be changed :
- WOOD is the default material.
- the AIR material allows the avatar to glide when walking on the texture.
- the PHANTOM material allows the avatar to pass through a face painted with this texture,
and moreover the mesh costs much less.
The PHANTOM material
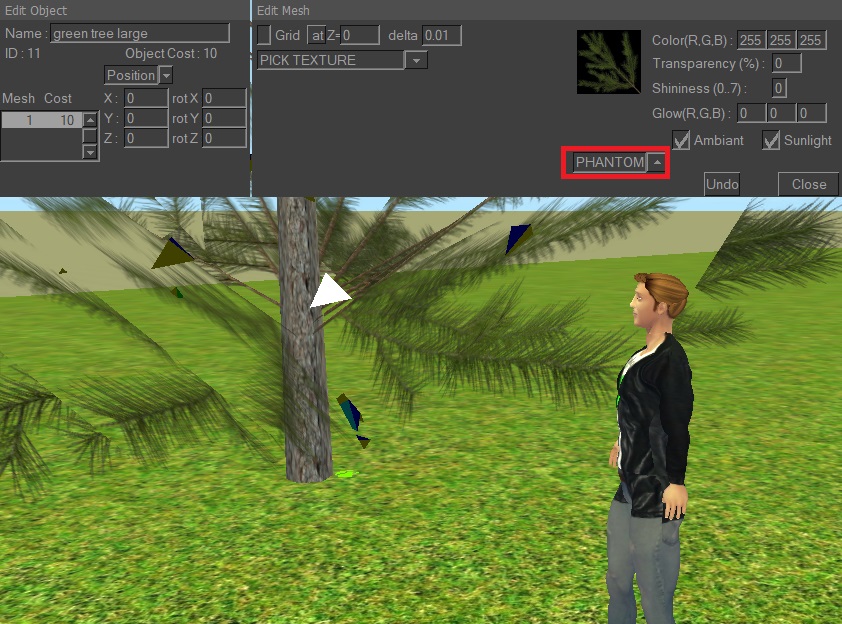
PHANTOM material is widely used, as it costs 4 times less than other materials.
It's important to note, however, that the avatar will pass through it, as no collision takes place.
Given its low cost, it is advisable to apply it to all small objects (vase, bottle, telephone, ..).
- For a tree, you can apply WOOD on the trunk, and PHANTOM on the foliage.
- For a staircase, you can apply the PHANTOM material on the steps,
and add an oblique ramp 100% transparent (therefore invisible) in WOOD material for the avatar to walk on.
- For a car, you can apply the FANTOM material on the expensive mesh,
and add a sphere or a stretched box (so invisible) in wood material so that the other cars can collide on it.
- Objects worn on the avatar always automatically receive PHANTOM material.